Follow along on instagram to see more about my Tiny Pottery Studio on Wheels! (@selfmadepottery)
FAQs
Why a tiny studio on wheels?
I have always been inspired by the tiny house movement and building a studio on wheels was the perfect way to enable my dream of having a home-studio while I don't own property I can build on.
Does it have a kiln?
Yes! I have a Skutt KMT-818 kiln in the tiny studio that runs on a super hefty 240V - RV extension cord plugged into an outlet in the garage. The studio also has running water via a hose-inlet, as well as 120v power for the lights and wheel from a standard extension cord.
How do you move it?
The studio has only moved once so far, when I transported it form my parent's driveway where it was built to my new house. Since it was the first time moving the studio, I erred on the side of caution and took everything out including the windows and doors. But with the help of a collegue and his truck it successfuly made the journey and is up and running again in it's new home.
Building the Tiny Studio on Wheels
Step 1: Modeling
Step 1: Modeling
My obsession with tiny houses began when I learned I could use 3D modeling software to design my own. Naturally, when I decided to build the Tiny Studio On Wheels, I began by modeling the entire build in Google Sketchup.
Step 2: Prepping the Trailer
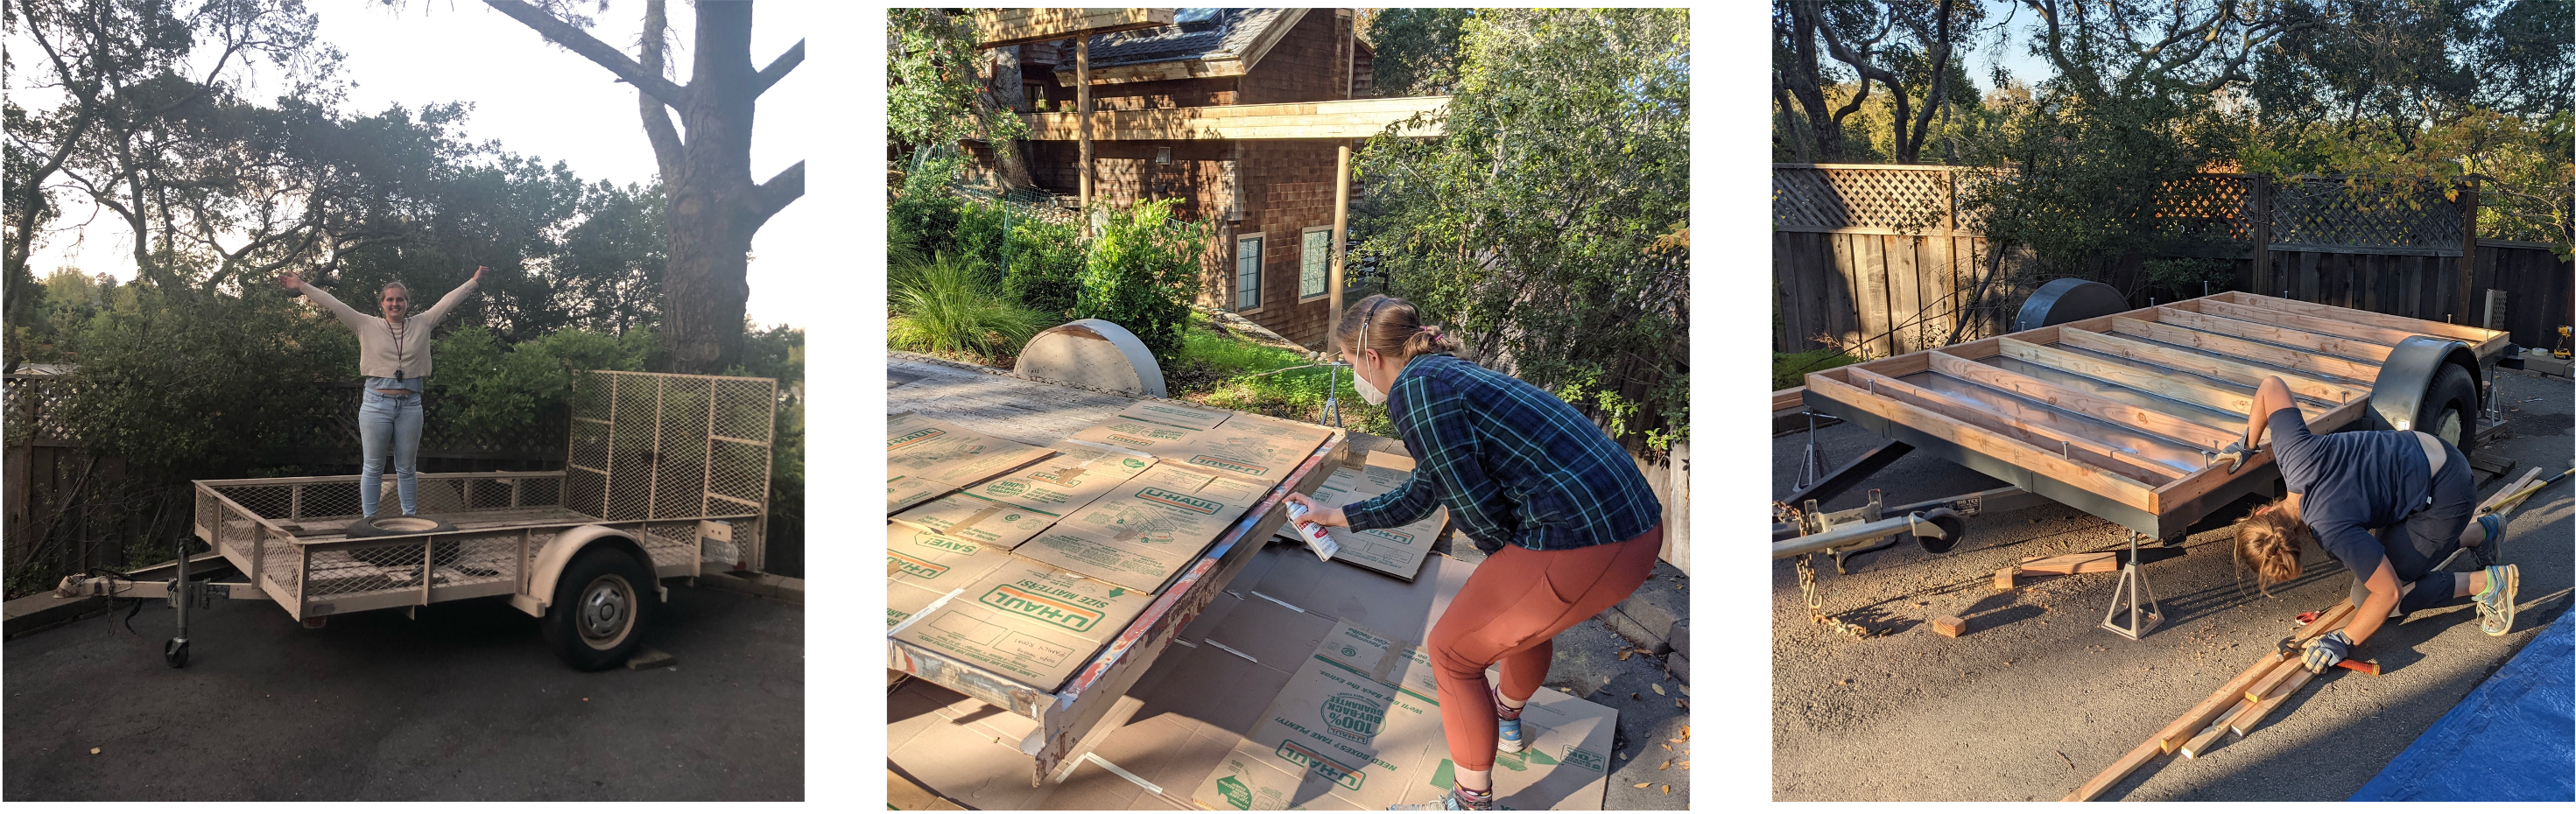
There are a number of options for finding a trailer, both custom built and used, but I decided on purchasing a used BigTex utility trailer from craigslist as it was going to be cheaper, and I would be able to pick it up much sooner. Once I had the trailer, I cut off all the metal railings, spray-painted it dark gray, and bolted down a wood-framed floor.
Step 3: Putting up the Walls

Framing was one of the fastest steps, especially once I decided to use 3.5" wood screws instead of nails. Using screws is a bit more expensive, but it saves hours of frustration trying to get nails to go in straight, and it means you can easily take things apart when you inevitably make mistakes -- this came in handy when I realized I had made the opening for the door too small. The walls ware wrapped in Tyvek house wrap, and covered in 1/2" plywood.
Step 4: The Roof
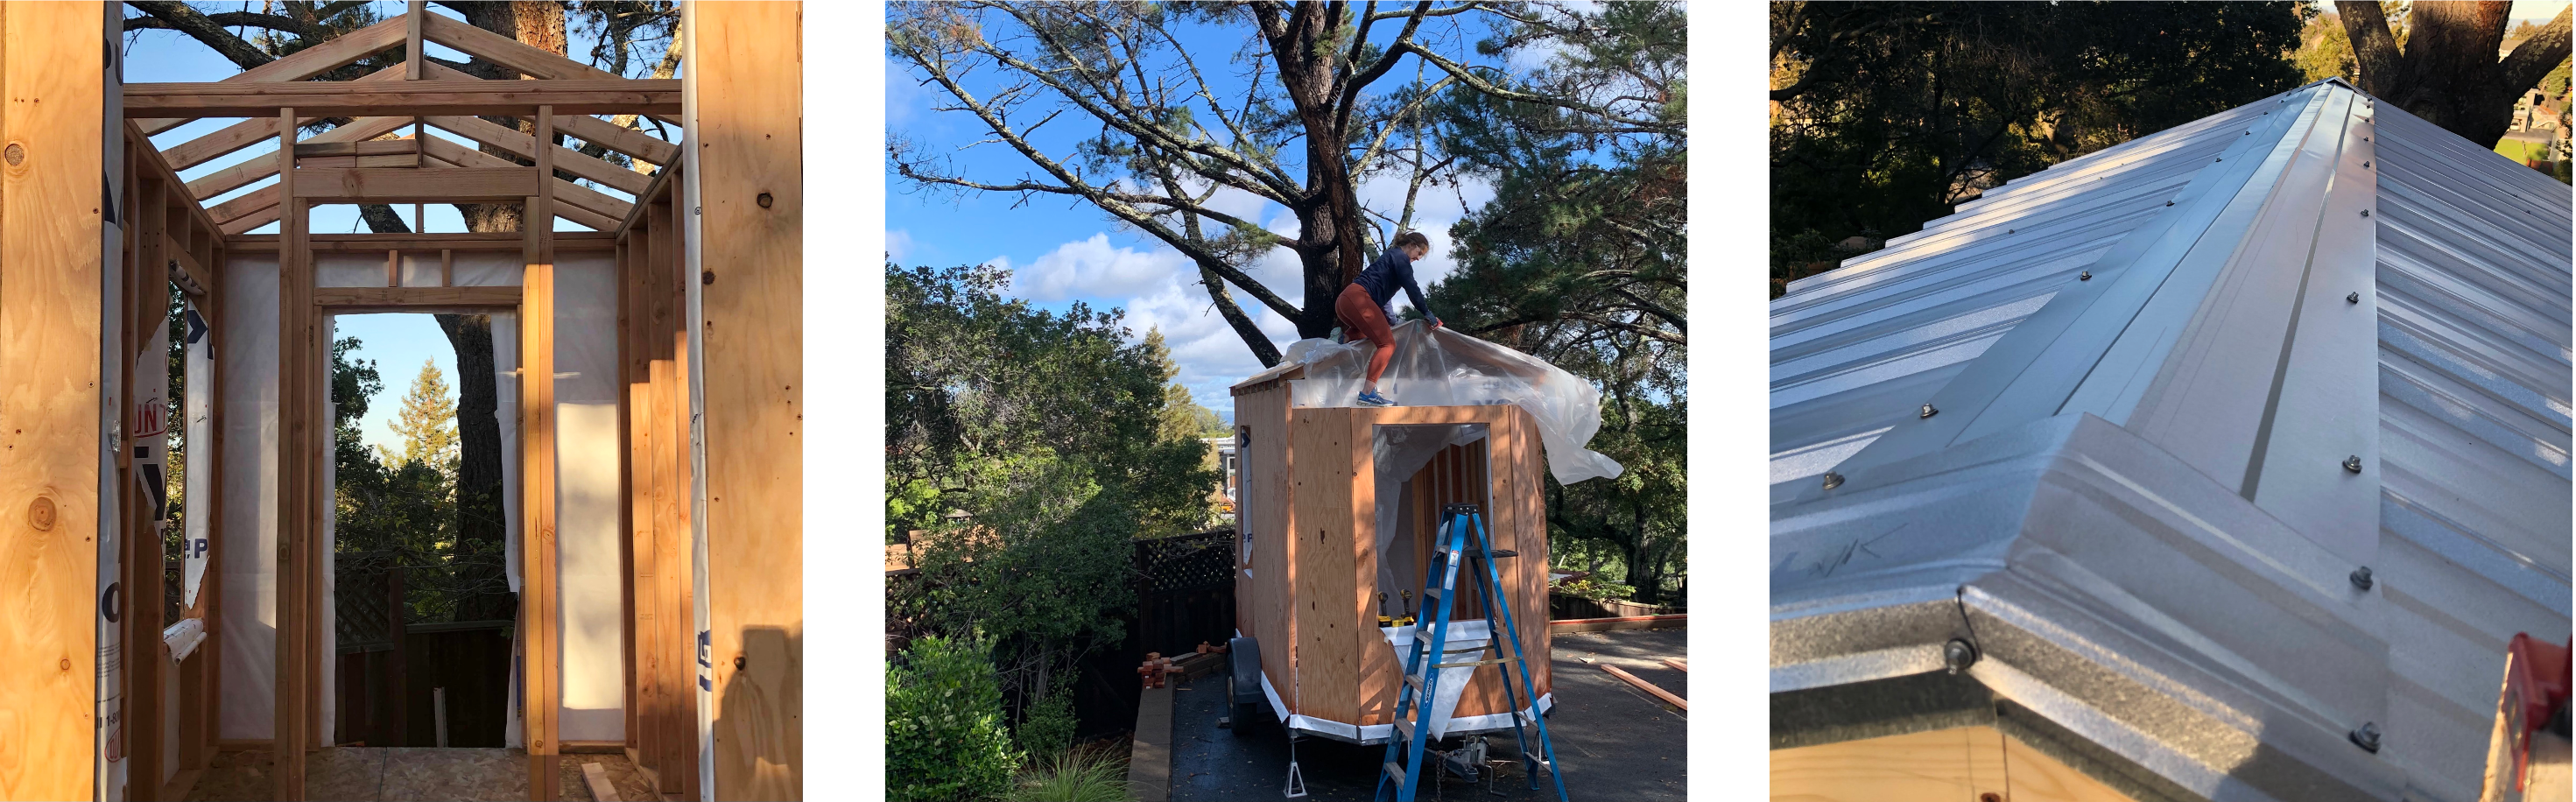
Cutting the rafters for the roof was one of the more challenging aspects of the build, but I managed to figure it out in the end. Once the rafters were up, I put up on 3/4" OSB sheets and covered them with a plastic water barrier. The final layer of the roof is galvanized steel panels.
Step 5: Painting
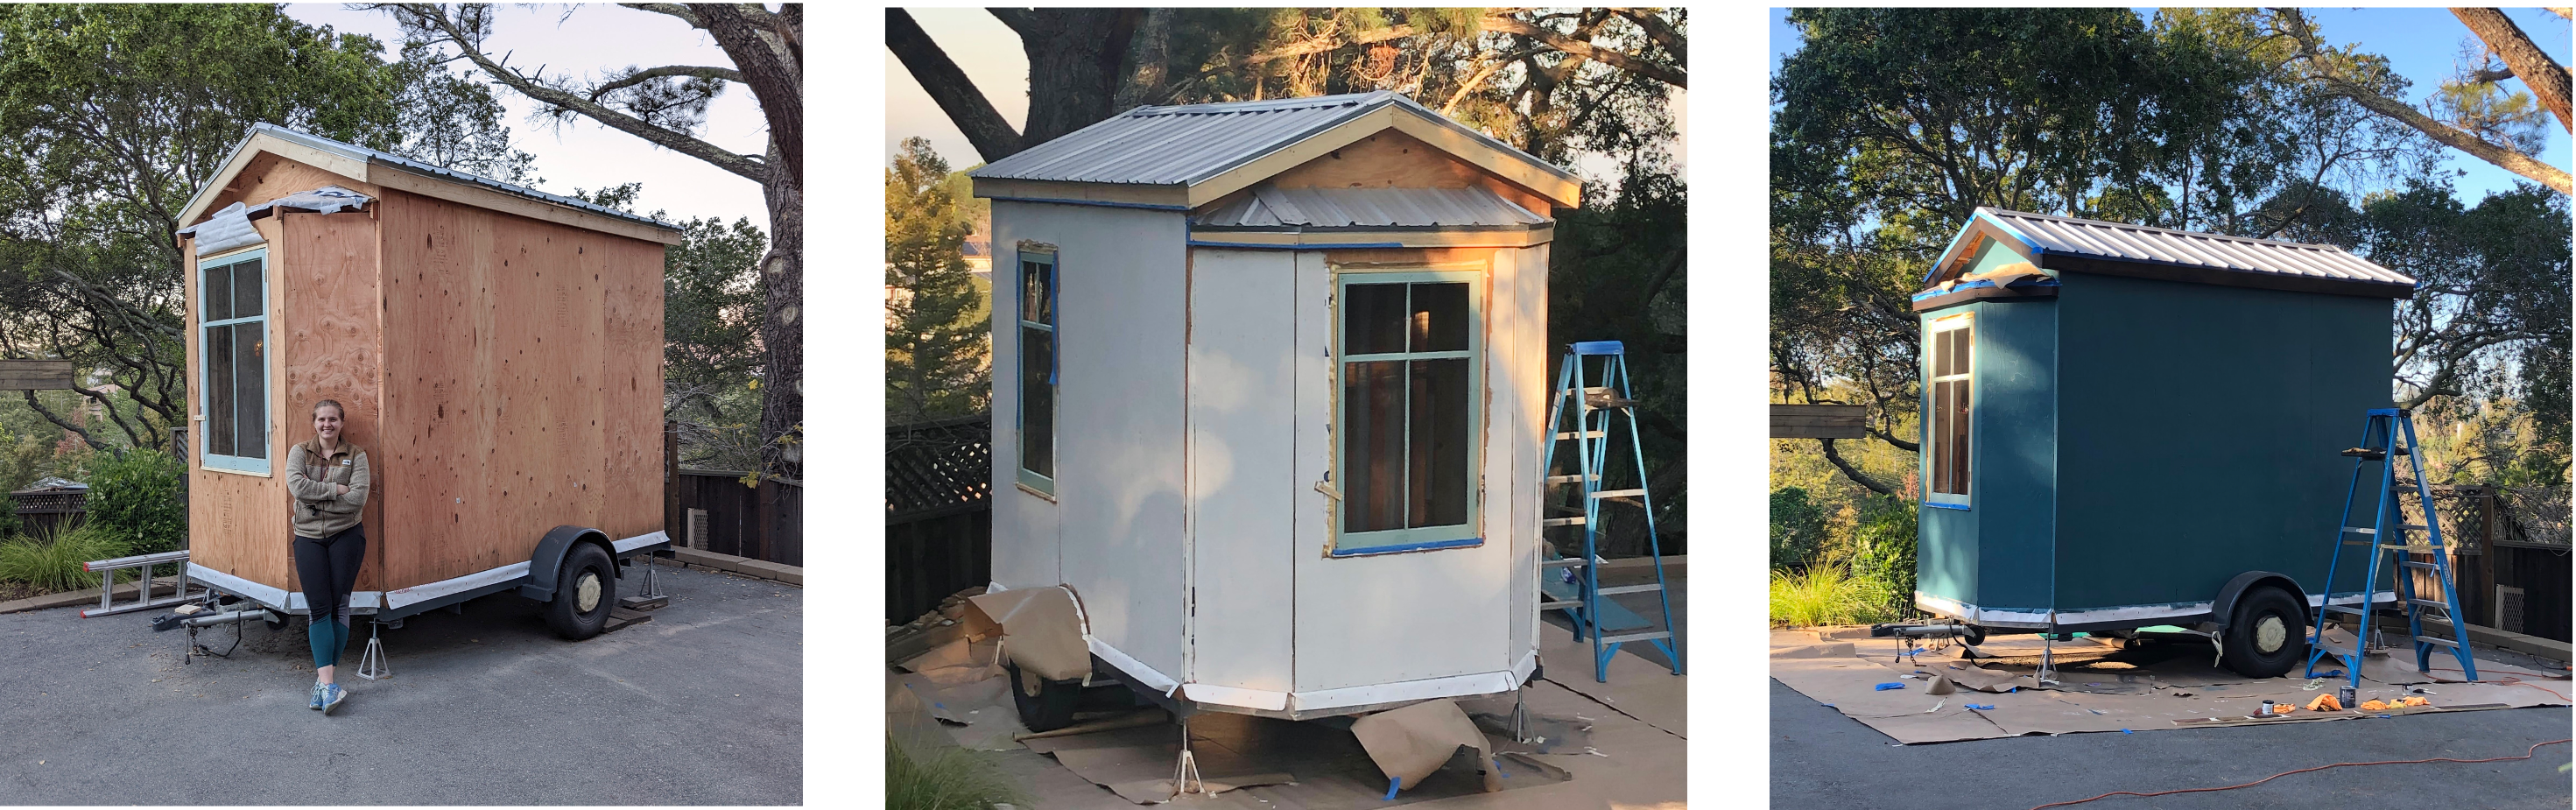
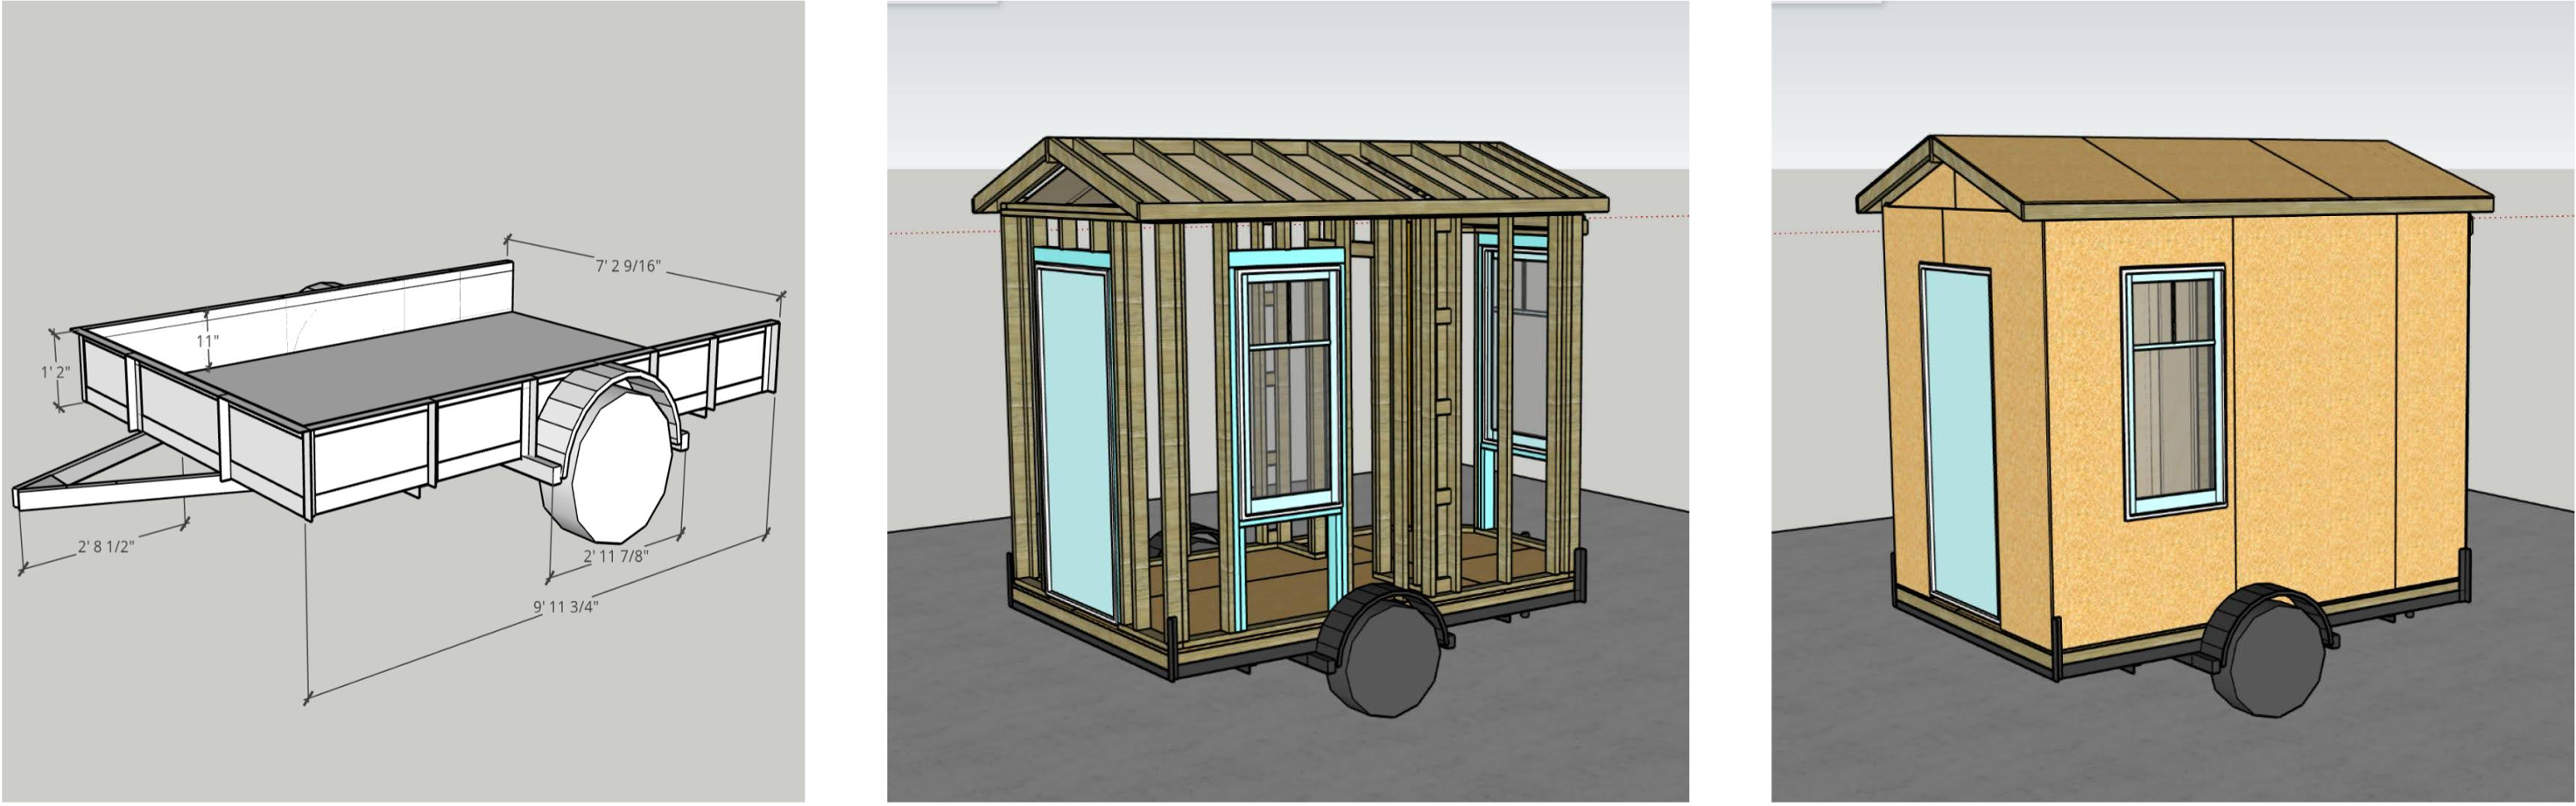
The Studio got one coat of primer followed by one coat of my favorite teal blue. The color ended up a bit darker than I anticipated, but I think it fits the Studio very nicely. The color also complements the trim on the windows, which come from the house I spent my childhood summers in, and which were generously gifted to me when that house was renovated.
Step 6: Adding Trim and Admiring the Finished Exterior
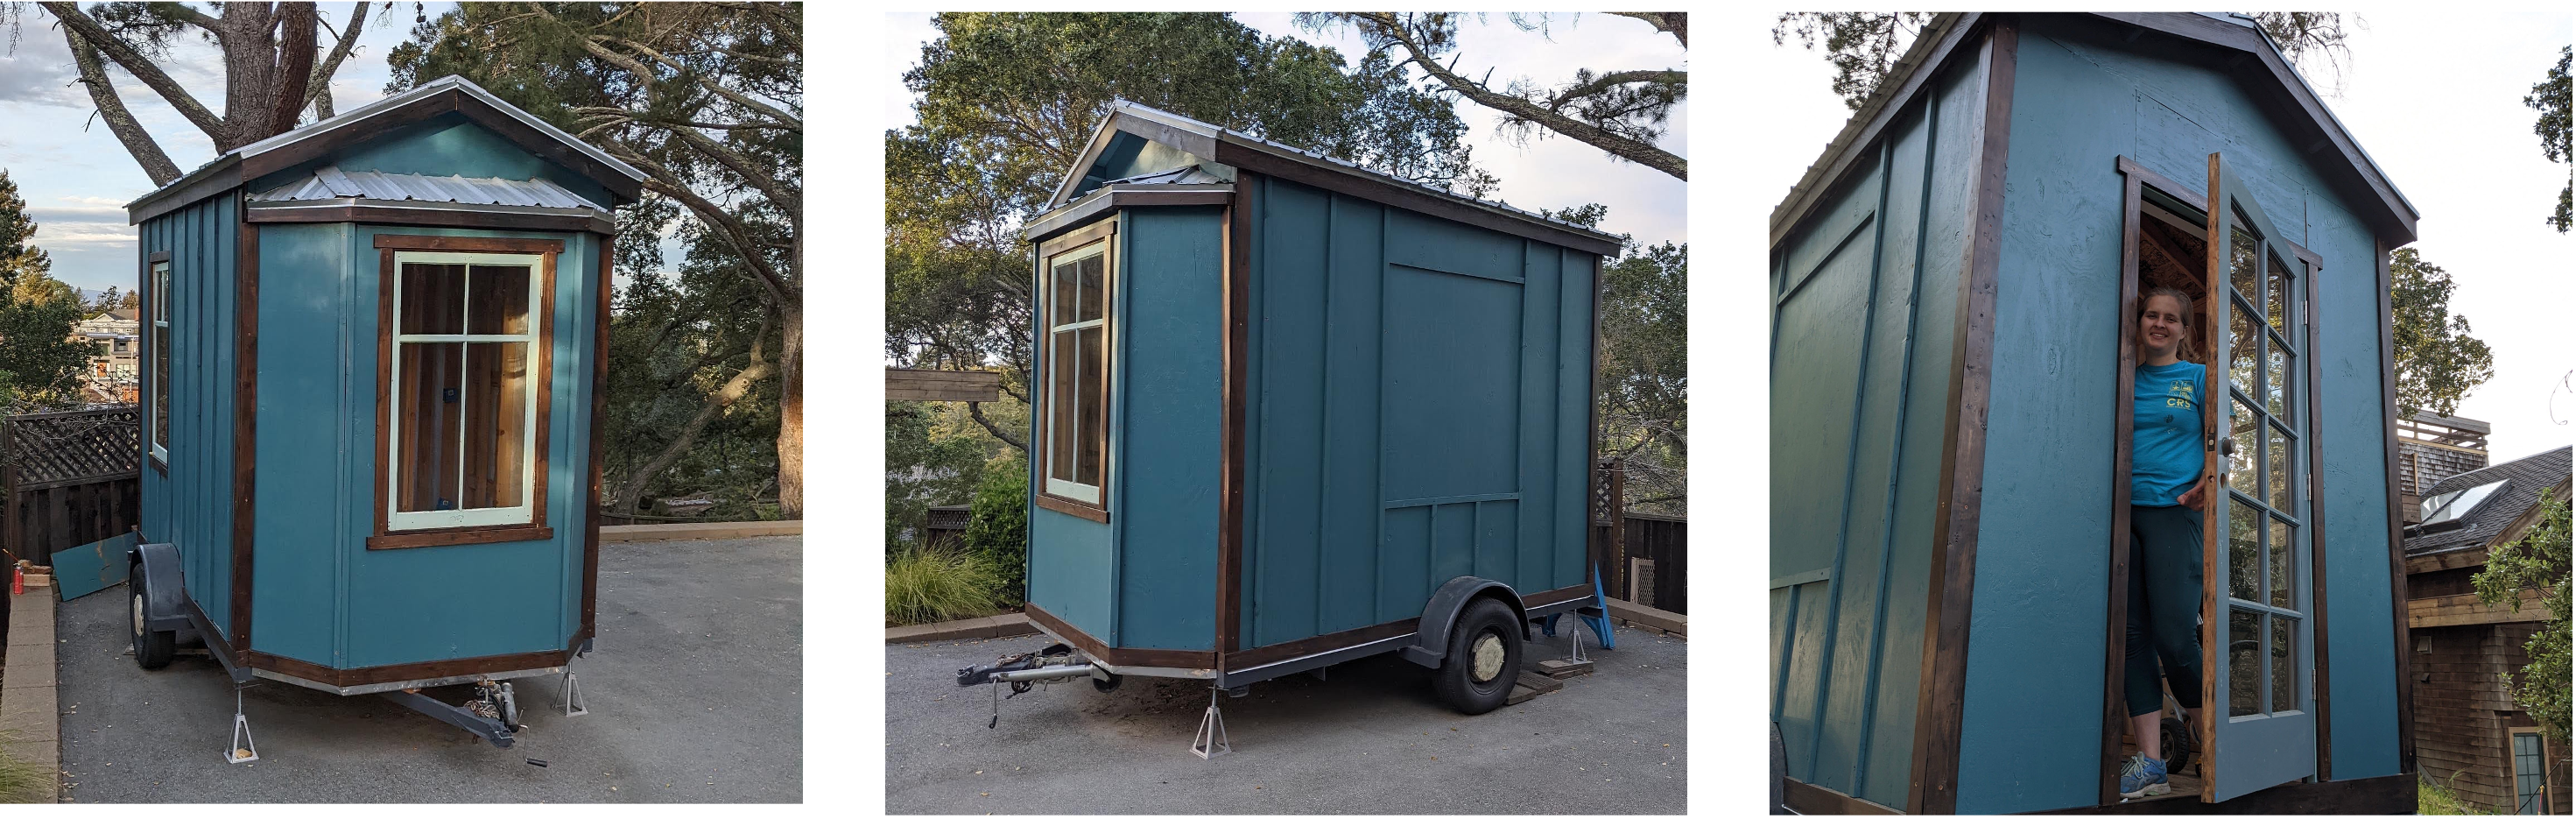
I opted for a dark brown stain for the trim and I love the way it really ties the whole Studio together, but I definitely didn't anticipate the amount of time that would go into cutting, sanding and staining all the wood. I also added vertical battens to give the structure some depth and visual interest. I am so beyond pleased with how the exterior of the Studio turned out. It is an amazing feeling to take an idea that has been living in your head for months, and be able to physically see it in the world.
Step 6: Finishing the Interior
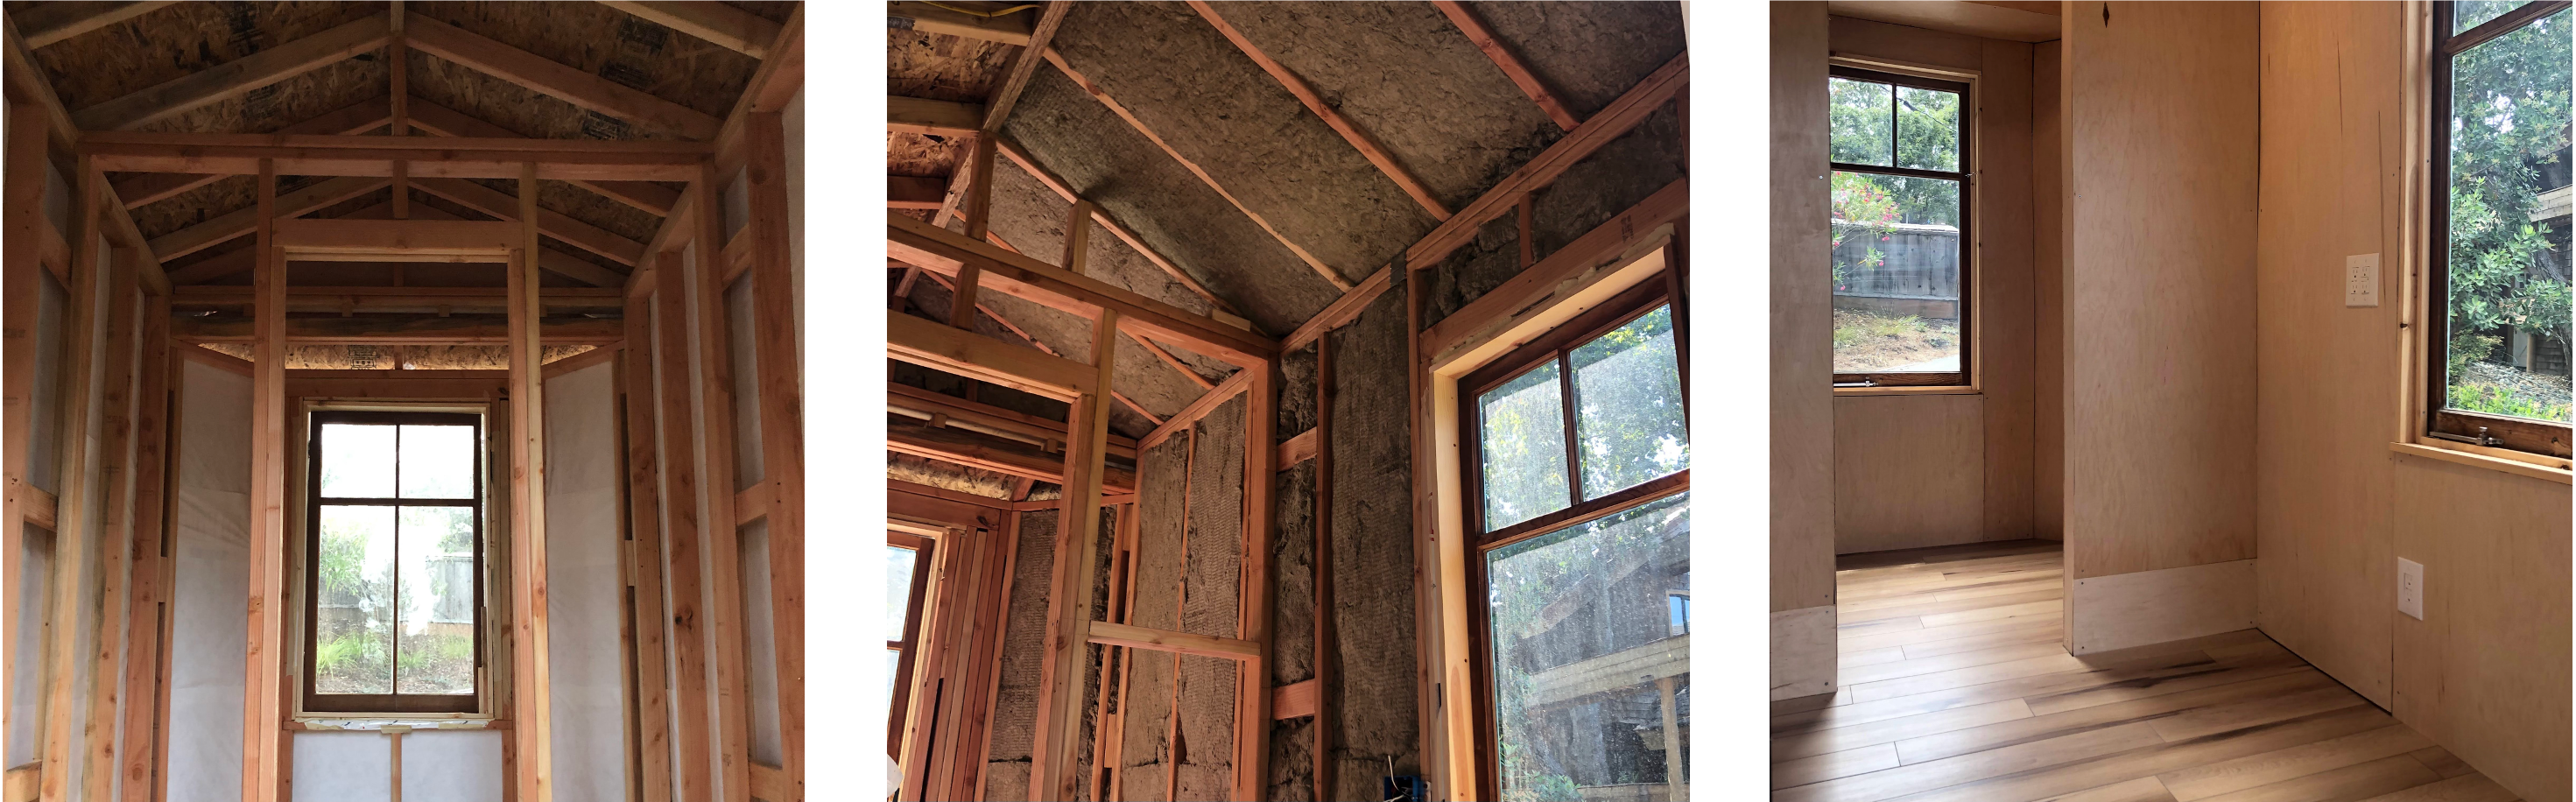
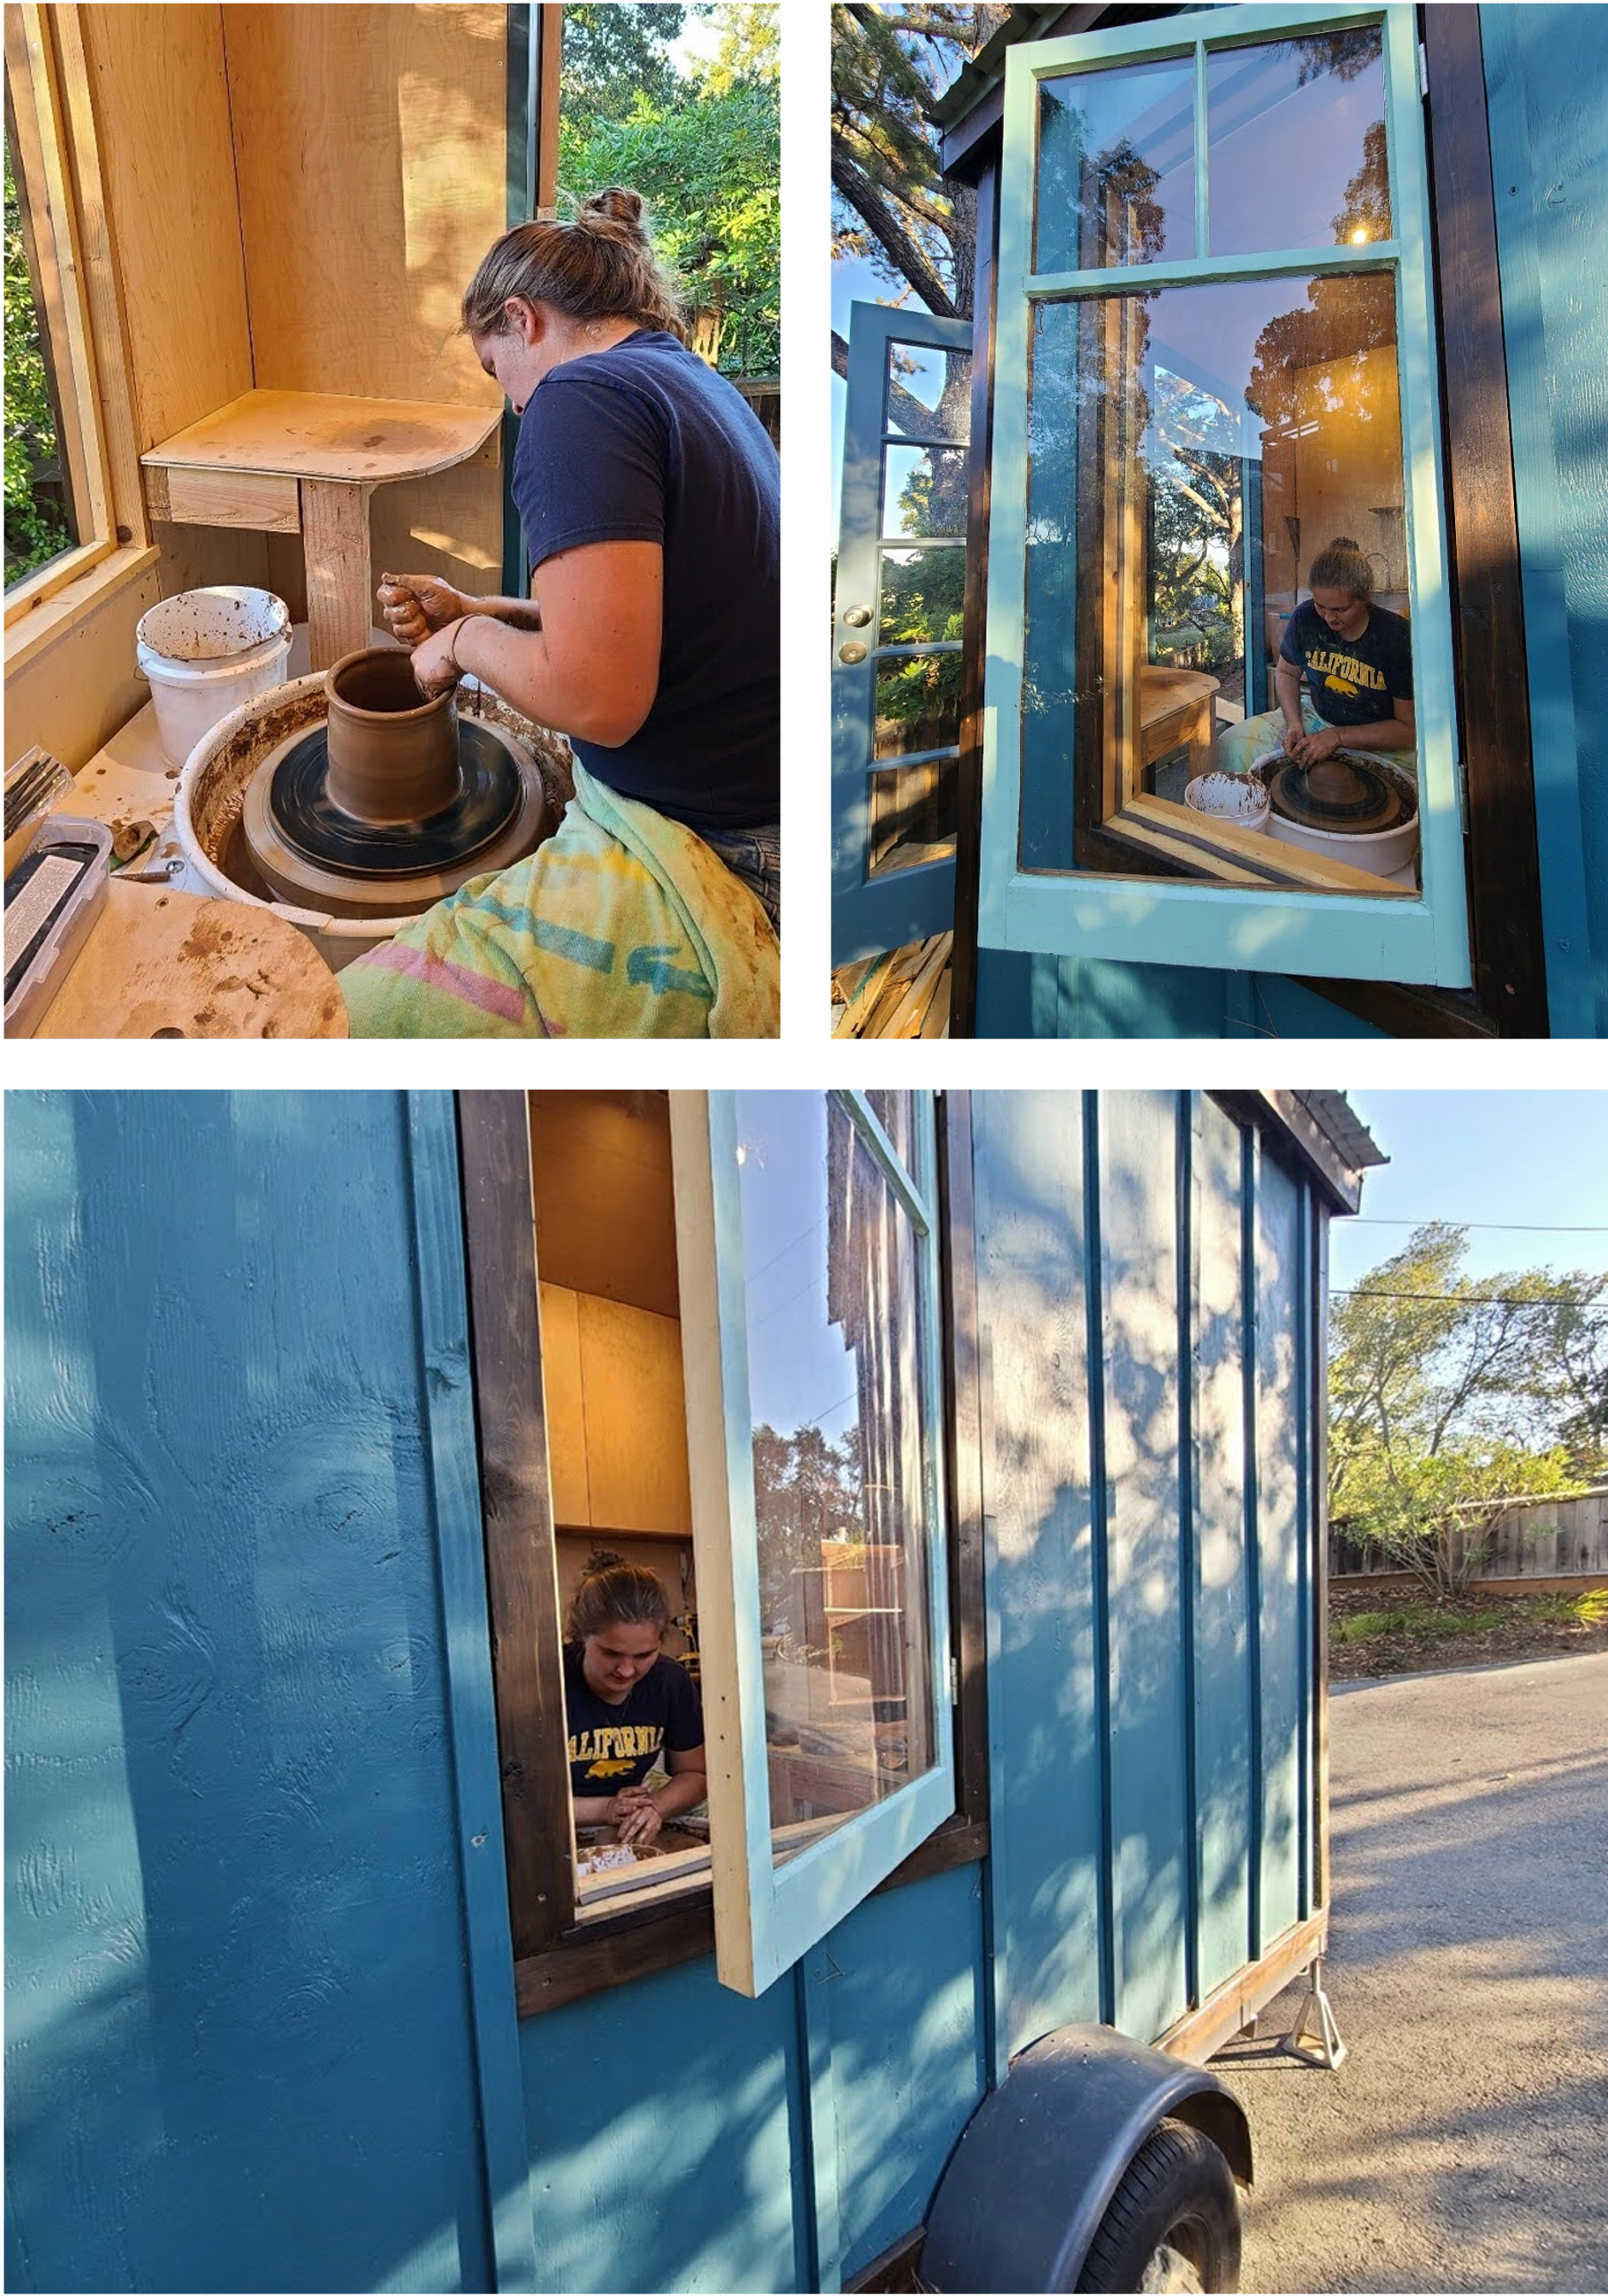
The inside of the Studio is divided into two rooms. The space towards the front of the trailer holds the kiln, while the back half is the main room where I do most of my work. The walls and ceiling have 4" of Rockwool insulation, and are covered in a beautifully light 1/4" maple plywood. The floors are waterproof vinyl planks made to look like hardwood. There is also electrical wiring (120V and 240V on separate circuits) and plumbing in the walls, which connect externally to two power cords and a garden hose.
Step 7: Turning it into a Pottery Studio
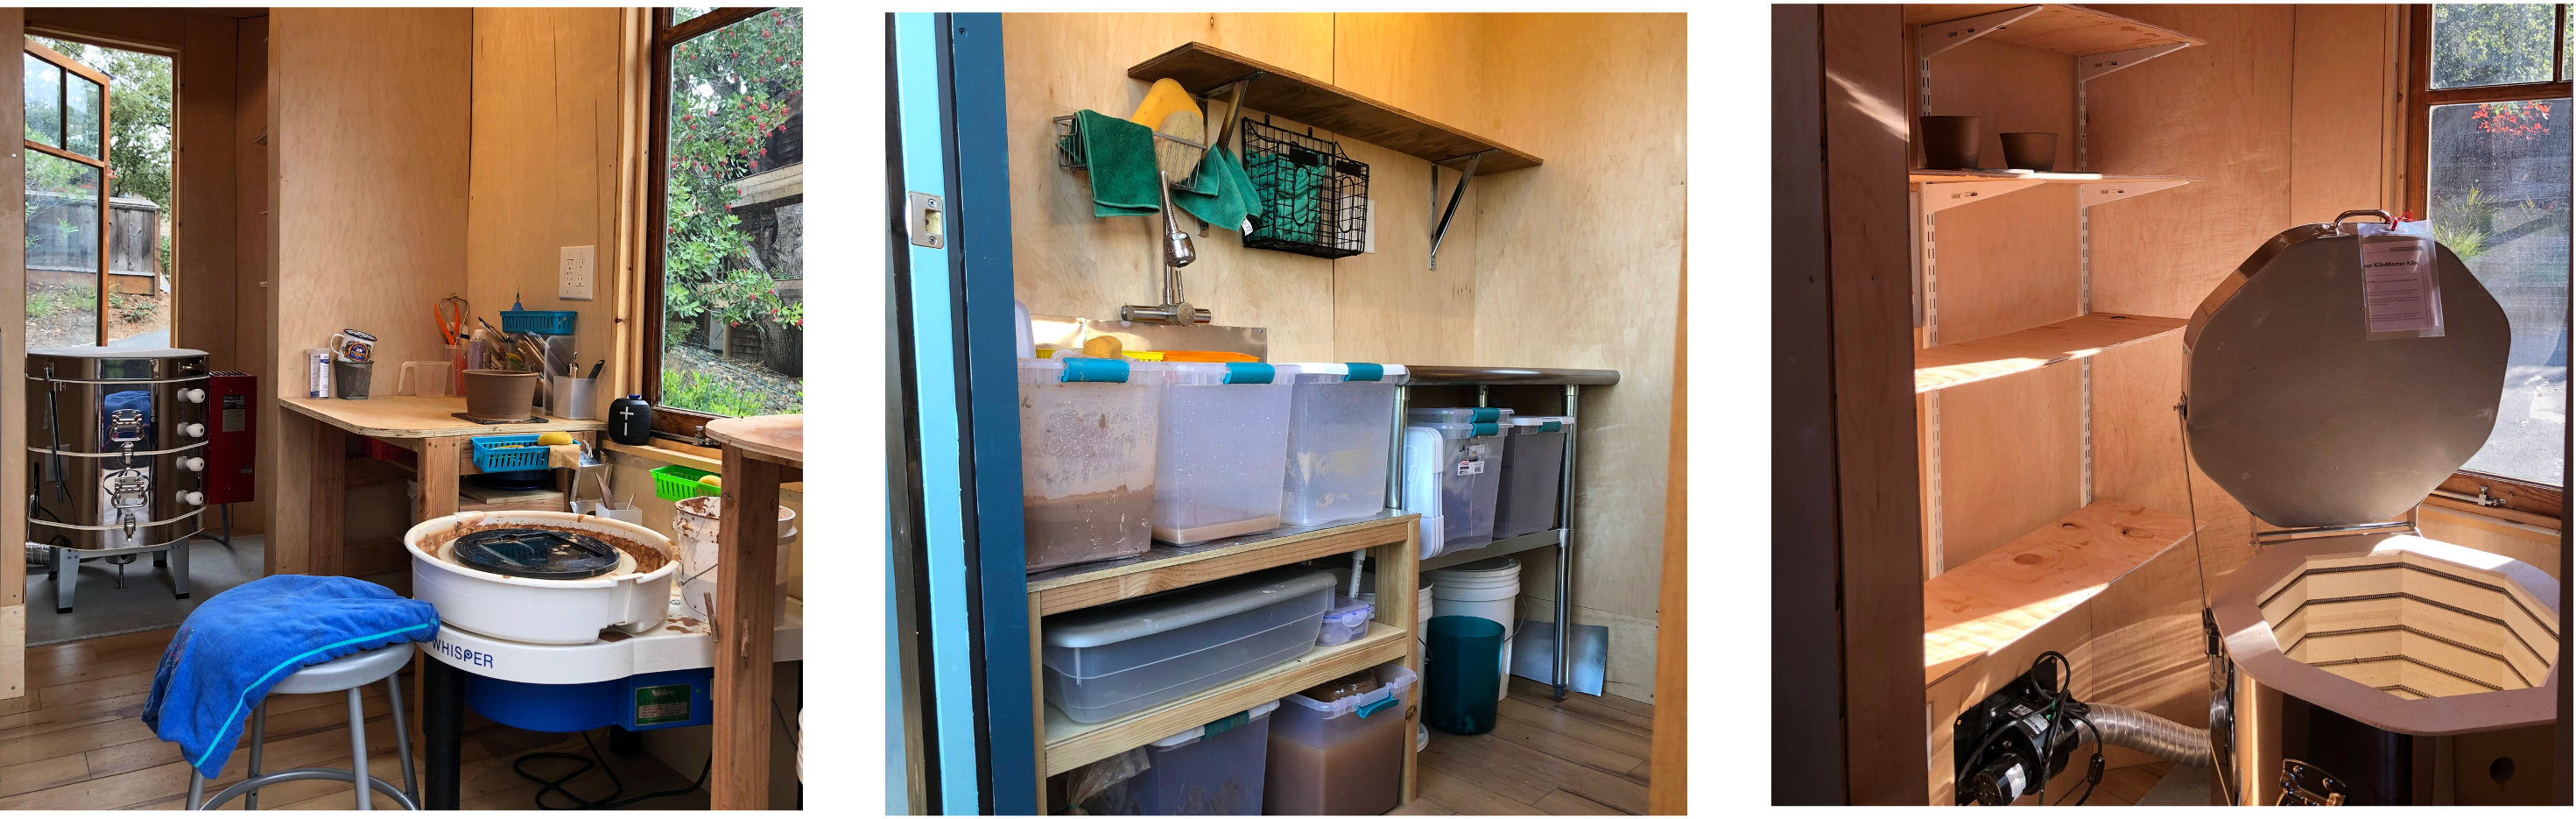
In the Studio I have a Shimpo VL-Whisper potter's wheel as well as a Skutt KMT-818 electric kiln that I typically fire to cone 6. I also have a work table, a wedging table, a glazing table, and a sink with a DIY filtration system.
The Studio in Action